feat: new guide - B2B per usage billing setup #653
There are no files selected for viewing
This file contains hidden or bidirectional Unicode text that may be interpreted or compiled differently than what appears below. To review, open the file in an editor that reveals hidden Unicode characters.
Learn more about bidirectional Unicode characters
| Original file line number | Diff line number | Diff line change | ||||
|---|---|---|---|---|---|---|
| @@ -0,0 +1,302 @@ | ||||||
| --- | ||||||
| page_id: 9c7d4e5a-6b8f-4c2a-9e3d-1f5a7c8b2d6e | ||||||
| title: B2B SaaS billing with organizations and per-user pricing | ||||||
| sidebar: | ||||||
| order: 1 | ||||||
| description: Implement a standard B2B SaaS architecture with organization-scoped access control, administrator-managed billing, and per-user pricing using metered features. | ||||||
| metadata: | ||||||
| topics: [billing, b2b, organizations, per-user pricing, metered usage, implementation] | ||||||
| sdk: [] | ||||||
| languages: [] | ||||||
| audience: [developer] | ||||||
| complexity: intermediate | ||||||
| keywords: [b2b saas, per-user pricing, seat-based billing, metered features, organization billing, implementation guide] | ||||||
| updated: 2026-01-15 | ||||||
| featured: false | ||||||
| deprecated: false | ||||||
| ai_summary: Complete guide to implementing B2B SaaS billing with organizations, per-user seat-based pricing, metered features, and administrator-managed subscriptions. | ||||||
| --- | ||||||
|
|
||||||
| This guide explains how to implement a **standard B2B SaaS billing architecture** using organizations, administrator-managed billing, and **per-user (seat-based) pricing** with metered features. | ||||||
|
|
||||||
| By the end of this guide, you will have: | ||||||
|
|
||||||
| - Organization-scoped access control | ||||||
| - A per-user billing model backed by metered features | ||||||
| - A billing admin role to manage subscriptions | ||||||
| - Multiple supported organization join patterns | ||||||
| - A strategy for tracking seat usage accurately | ||||||
|
|
||||||
|
|
||||||
|
|
||||||
| ### What you need | ||||||
|
|
||||||
| - A Kinde account | ||||||
| - A Stripe account | ||||||
| - An application connected to Kinde | ||||||
| - Access to the Kinde dashboard | ||||||
|
|
||||||
|
|
||||||
|
|
||||||
| ## Step 1: Connect Stripe | ||||||
|
|
||||||
| Connect your **Stripe** account from the Kinde dashboard. | ||||||
|
|
||||||
| 1. Go to **Dashboard > Billing > Payment management** | ||||||
| 2. Select **Connect Stripe** | ||||||
| 3. Follow the Stripe onboarding flow | ||||||
|
|
||||||
| After connecting Stripe: | ||||||
|
|
||||||
| - Test and live environments are supported | ||||||
| - Billing plans published in Kinde automatically sync to Stripe | ||||||
| - Stripe products and prices are managed by Kinde | ||||||
|
|
||||||
| **Learn more:** [Manage Stripe connection](https://docs.kinde.com/billing/payment-management/manage-stripe-connection/) | ||||||
|
|
||||||
|
|
||||||
|
|
||||||
| ## Step 2: Create an organization billing plan | ||||||
|
|
||||||
| Create a billing plan that is scoped to **Organizations**. | ||||||
|
|
||||||
| 1. Go to **Dashboard > Billing** | ||||||
| 2. Select **Add a plan** | ||||||
| 3. In **This plan is for**, select **Organizations** | ||||||
| 4. Enter a name, description, key, and currency | ||||||
| 5. Select **Save** | ||||||
|
|
||||||
| 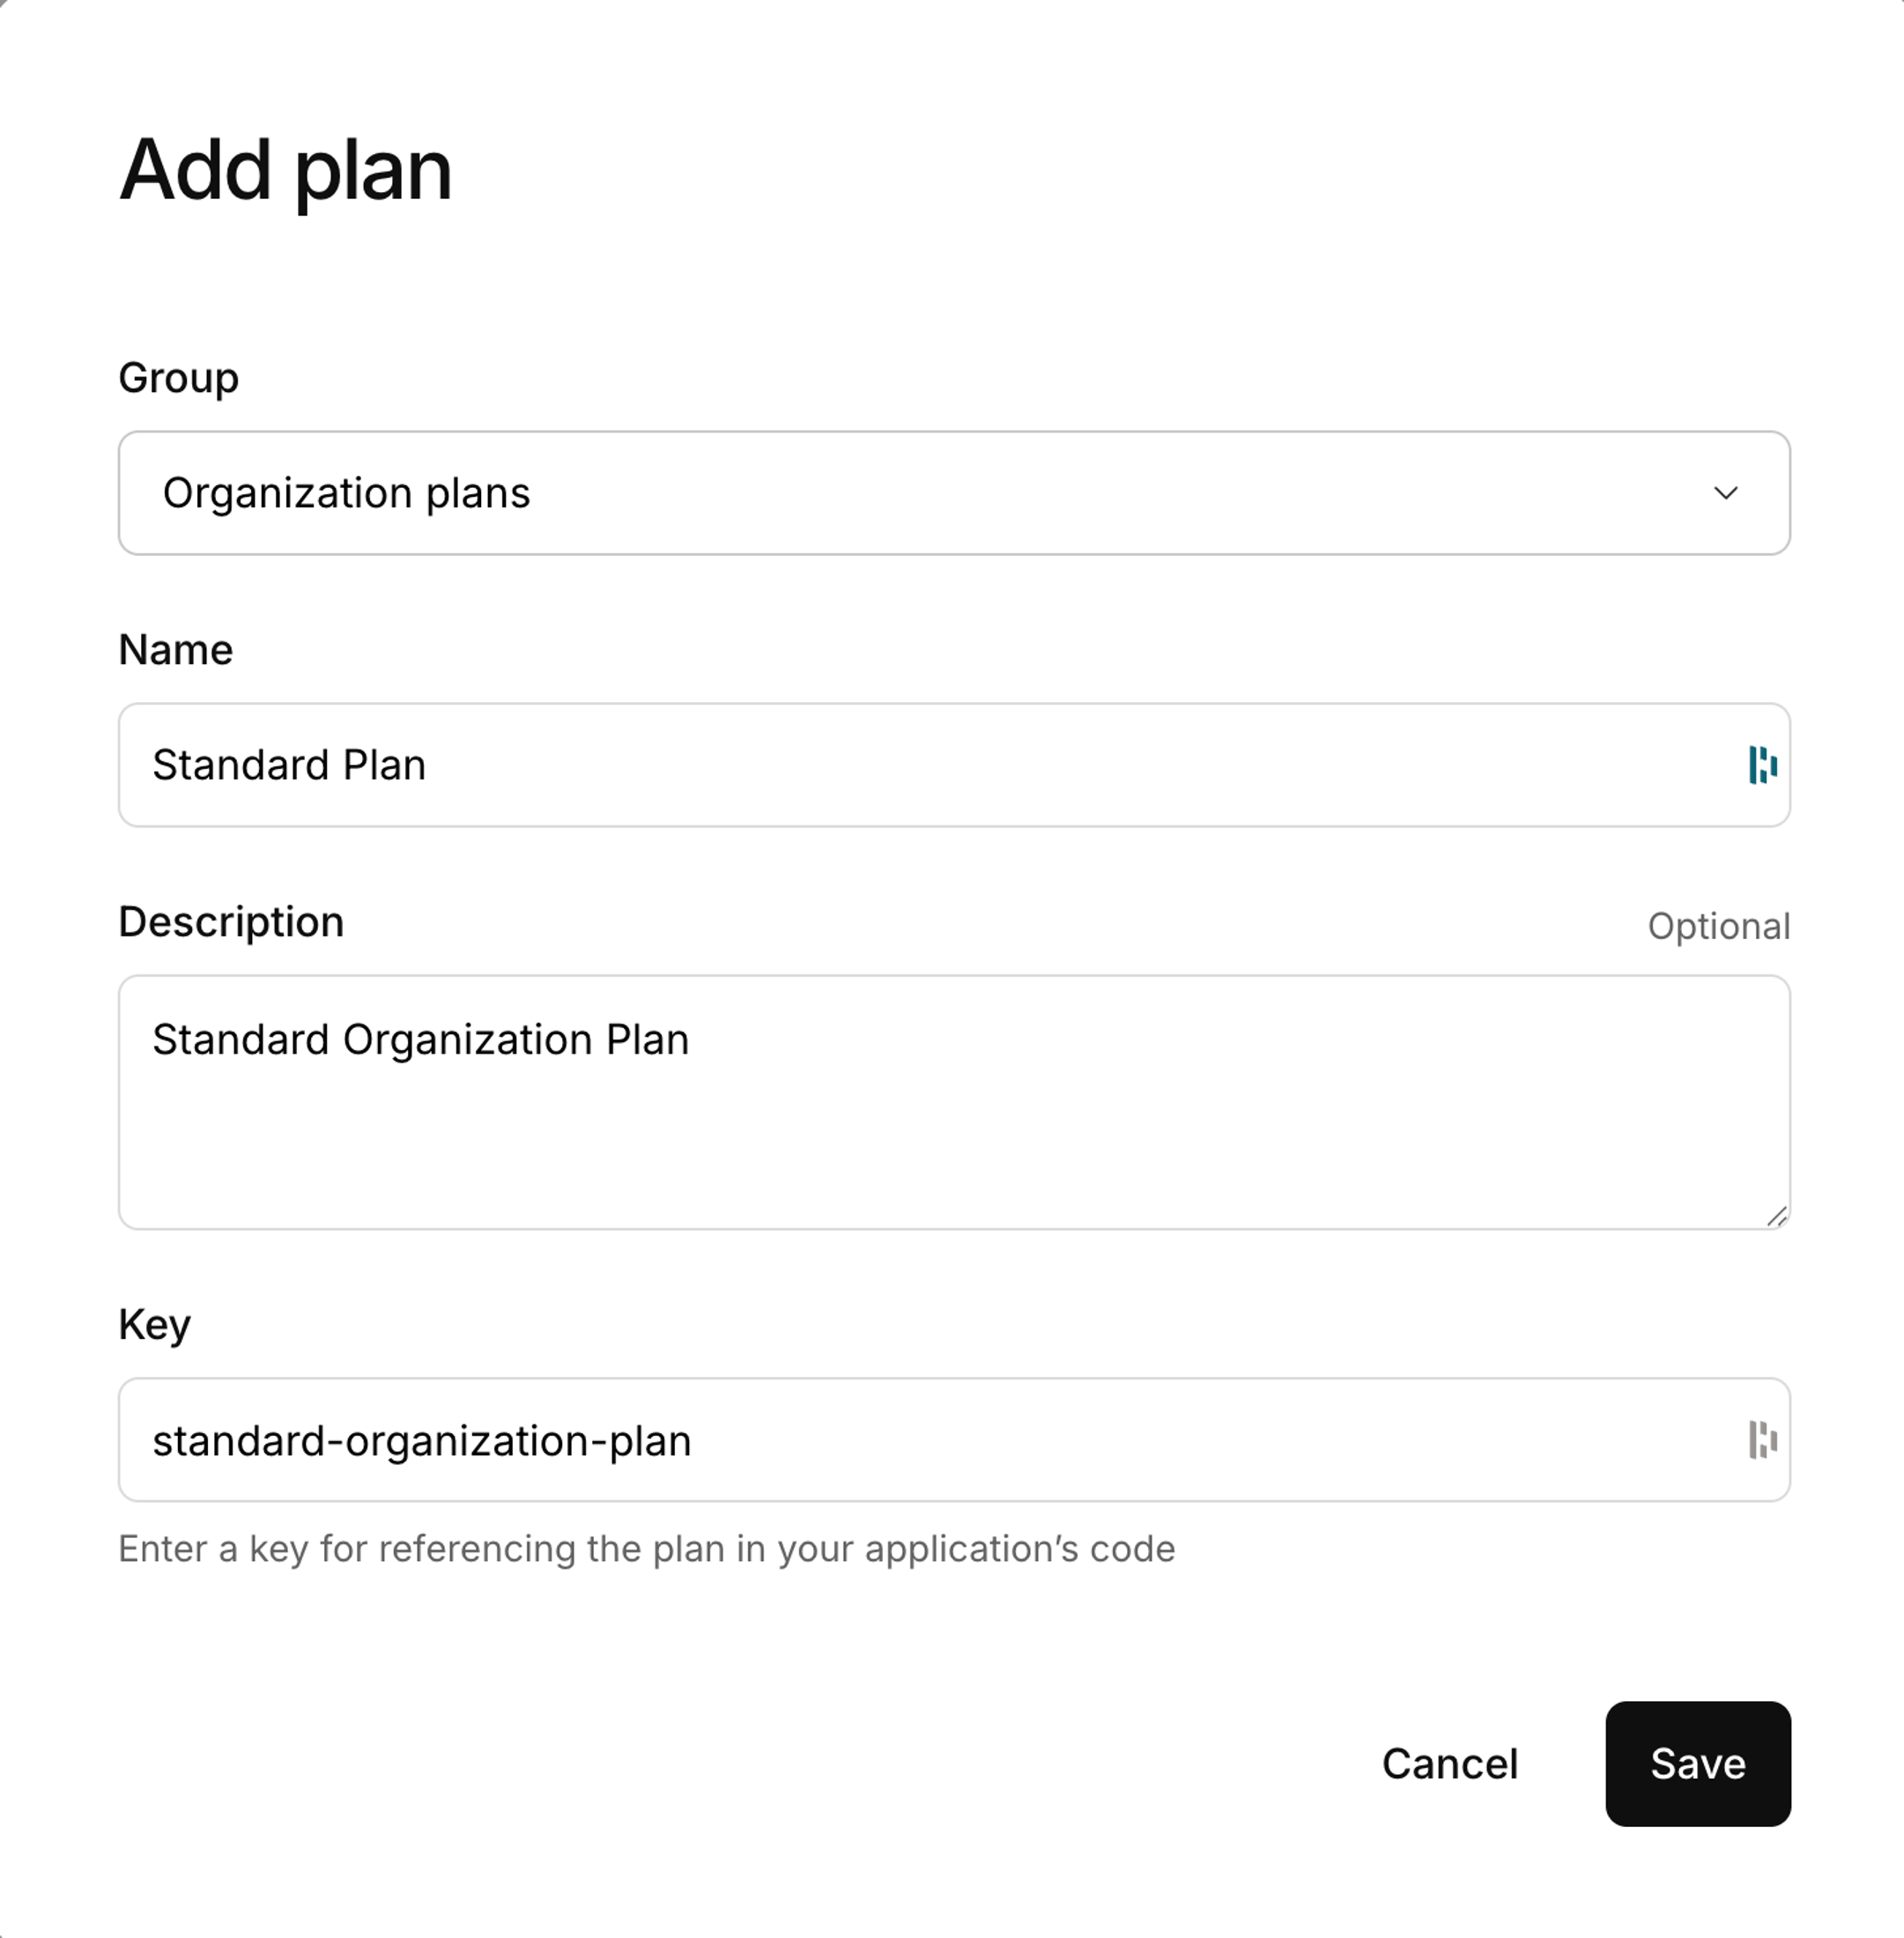 | ||||||
|
|
||||||
| This plan represents the subscription that organizations will purchase. | ||||||
|
|
||||||
|
|
||||||
|
|
||||||
| ## Step 3: Add a metered feature for user seats | ||||||
|
|
||||||
| Add a **metered feature** to represent per-user (seat-based) pricing. | ||||||
|
|
||||||
| 1. Open the organization plan | ||||||
| 2. Scroll to **Features and pricing** | ||||||
| 3. Select **Add feature** | ||||||
| 4. Select **New metered** | ||||||
|
|
||||||
| Configure the feature: | ||||||
|
|
||||||
| - **Feature name:** `Users` | ||||||
| - **Key:** `user` | ||||||
| This key is required when submitting metered usage. | ||||||
| - **Maximum units:** | ||||||
| Leave empty for unlimited users, or set a limit if required. | ||||||
| - **Unit measurement name:** `user` or `seat` | ||||||
| - **Pricing model:** Per unit | ||||||
| - **Price per unit:** Fixed price per user | ||||||
| - **Line item description:** `User seats` | ||||||
|
|
||||||
| Select **Save**. | ||||||
|
|
||||||
|
|
||||||
|
|
||||||
| ## Step 4: Add an optional base subscription charge | ||||||
|
|
||||||
| If your pricing model requires a fixed base fee in addition to per-user pricing: | ||||||
|
|
||||||
| 1. In the same plan, select **Add feature** | ||||||
| 2. Select **Fixed charge** | ||||||
| 3. Configure the feature: | ||||||
| - **Name:** Base subscription fee | ||||||
| - **Price:** Optional (can be `$0.00`) | ||||||
|
|
||||||
| 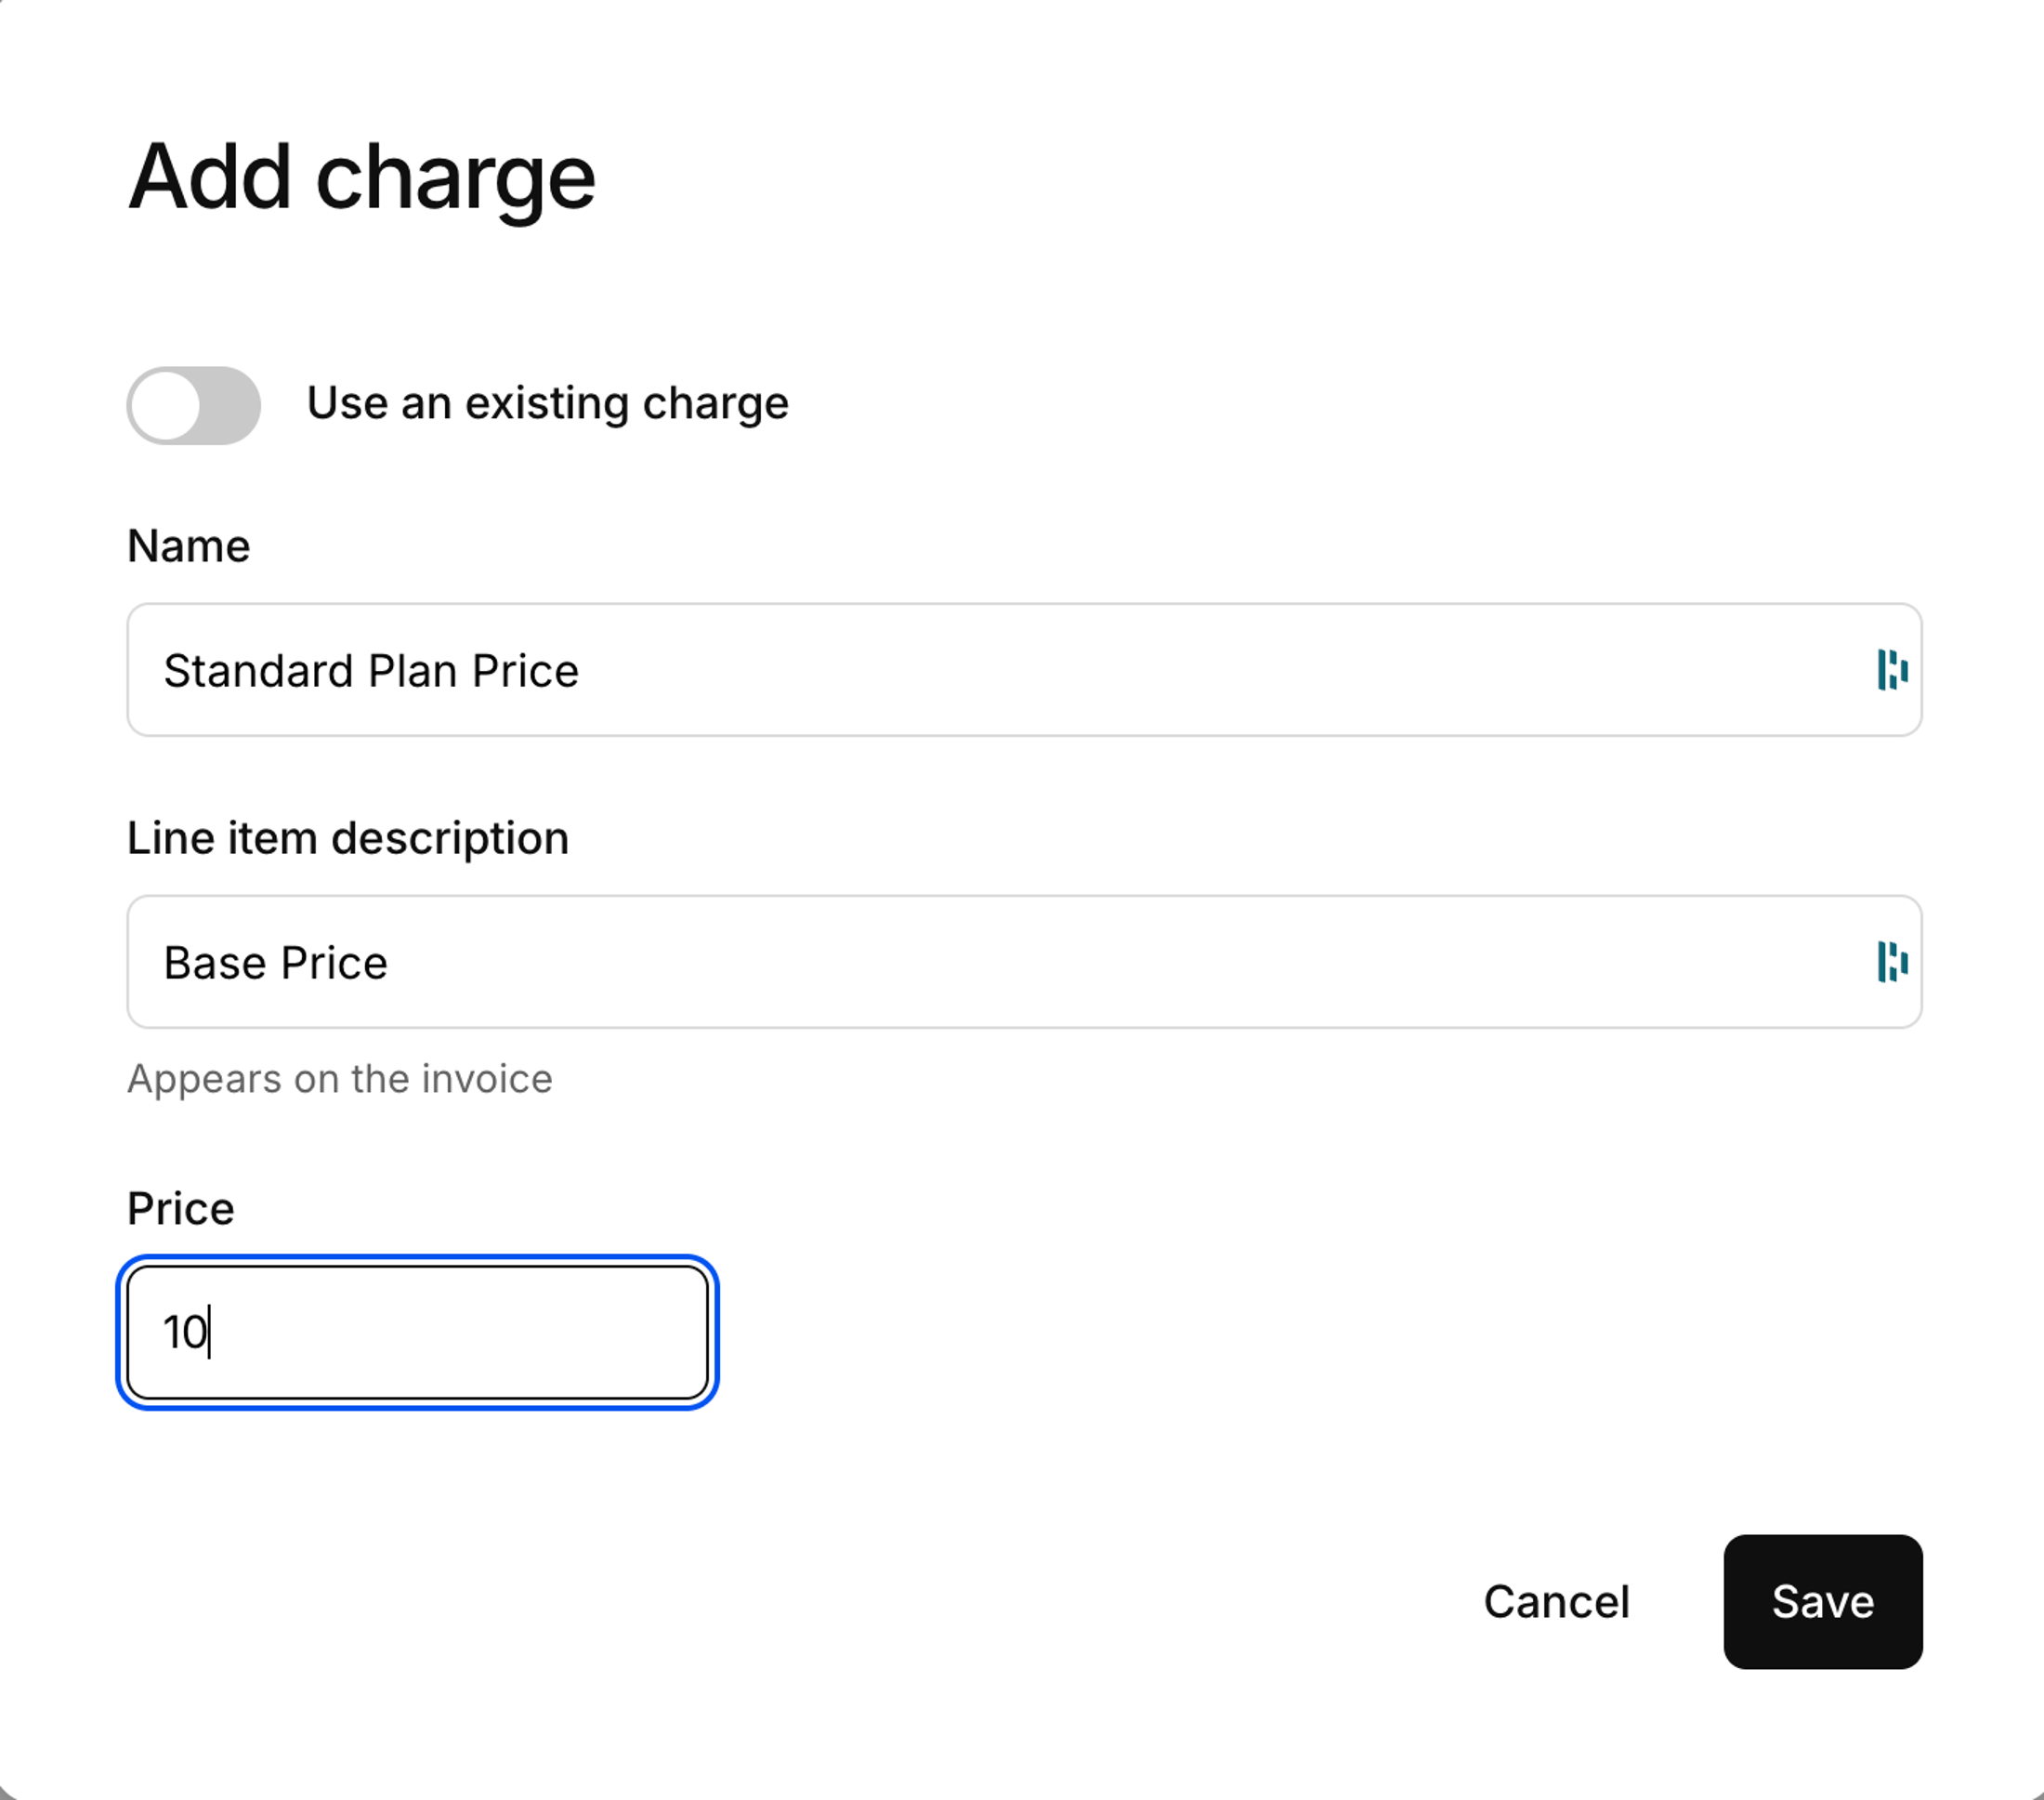 | ||||||
|
|
||||||
| This allows you to combine a flat subscription fee with per-user billing. | ||||||
|
|
||||||
|
|
||||||
|
|
||||||
| ## Step 5: Publish the billing plan | ||||||
|
|
||||||
| Billing plans must be published before they can be used. | ||||||
|
|
||||||
| 1. Open the billing plan | ||||||
| 2. Select **Publish** | ||||||
|
|
||||||
| After publishing, the plan: | ||||||
|
|
||||||
| - Appears in pricing tables | ||||||
| - Can be selected during signup | ||||||
| - Syncs to Stripe | ||||||
|
|
||||||
|
|
||||||
|
|
||||||
| ## Step 6: Create a pricing table | ||||||
|
|
||||||
| Pricing tables allow users to select a plan during signup. | ||||||
|
|
||||||
| 1. Go to **Dashboard > Billing > Pricing tables** | ||||||
| 2. Create or customize a pricing table | ||||||
| 3. Toggle **Make live** | ||||||
|
|
||||||
| Save the **pricing table key**, as it is required during signup. | ||||||
|
|
||||||
|
|
||||||
|
|
||||||
| ## Step 7: Create a Billing Admin role | ||||||
|
|
||||||
| Organization billing should be managed by administrators. | ||||||
|
|
||||||
| 1. Go to **Settings > Roles** | ||||||
| 2. Select **Add role** | ||||||
| 3. Configure the role: | ||||||
| - **Name:** Billing Admin | ||||||
| - **Key:** `billing-admin` | ||||||
| - **Assign to the creator if organizations self-sign up:** Enabled | ||||||
| - **System permission:** `org:write:billing` | ||||||
| 4. Select **Save** | ||||||
|
|
||||||
| Users with this role can manage subscriptions, plans, and payment methods for their organization. | ||||||
|
|
||||||
|
|
||||||
|
|
||||||
| ## Step 8: Enable organization creation during signup | ||||||
|
|
||||||
| Allow users to create organizations when signing up. | ||||||
|
|
||||||
| 1. Go to **Settings > Environment > Organizations** | ||||||
| 2. Enable **Organization creation during signup** | ||||||
|
|
||||||
|
|
||||||
|
|
||||||
| ## Step 9: Handle the first user (organization creator) | ||||||
|
|
||||||
| The first user creates the organization and selects a plan. | ||||||
|
|
||||||
| ### Trigger organization creation from your application | ||||||
|
|
||||||
| ```jsx | ||||||
| <RegisterLink | ||||||
| orgName="Paid Users Organization" | ||||||
| isCreateOrg | ||||||
| pricingTableKey="your_pricing_table_key" | ||||||
| > | ||||||
| Sign up your company | ||||||
| </RegisterLink> | ||||||
| ``` | ||||||
|
|
||||||
| ### Use a direct authorization URL | ||||||
|
|
||||||
| ```bash | ||||||
| https://<your_subdomain>.kinde.com/oauth2/auth | ||||||
| ?response_type=code | ||||||
| &client_id=YOUR_CLIENT_ID | ||||||
| &redirect_uri=YOUR_REDIRECT_URI | ||||||
| &scope=openid profile email | ||||||
| &is_create_org=true | ||||||
| &pricing_table_key=YOUR_PRICING_TABLE_KEY | ||||||
| ``` | ||||||
|
|
||||||
| ### Organization Signup behavior | ||||||
|
|
||||||
| 1. The user registers | ||||||
| 2. A new organization is created | ||||||
| 3. The user is assigned the Billing Admin role | ||||||
| 4. The pricing table is displayed | ||||||
| 5. Payment details are collected | ||||||
| 6. The organization is created with an active subscription | ||||||
|
|
||||||
|
|
||||||
|
|
||||||
| ## Step 10: Add users to an existing organization | ||||||
|
|
||||||
| Additional users can join an existing organization using multiple supported approaches. | ||||||
|
|
||||||
| Before enabling any join flow: | ||||||
|
|
||||||
| - Ensure the required authentication methods are enabled | ||||||
| - Go to **Org > Policies** and enable **Allow org members to be auto-added** | ||||||
|
|
||||||
| ### Option 1: Manually add users (dashboard) | ||||||
|
|
||||||
| Administrators can add users directly from the dashboard. | ||||||
|
|
||||||
| - No custom code required | ||||||
| - Intended for internal or low-volume usage | ||||||
|
|
||||||
| ### Option 2: Allow self sign-up using an organization code (recommended) | ||||||
|
Contributor
There was a problem hiding this comment. Hyphenate “self‑sign‑up” in the heading. ✏️ Proposed copy edit-### Option 2: Allow self sign-up using an organization code (recommended)
+### Option 2: Allow self-sign-up using an organization code (recommended)📝 Committable suggestion
Suggested change
🧰 Tools🪛 LanguageTool[grammar] ~224-~224: Use a hyphen to join words. (QB_NEW_EN_HYPHEN) 🤖 Prompt for AI Agents |
||||||
|
|
||||||
| Users join by signing up or logging in with an organization code. | ||||||
|
|
||||||
| ```jsx | ||||||
| <RegisterLink orgCode="org_8d350c10295bf"> | ||||||
| Sign up | ||||||
| </RegisterLink> | ||||||
| ``` | ||||||
|
|
||||||
| ```jsx | ||||||
| <LoginLink orgCode="org_8d350c10295bf"> | ||||||
| Sign in | ||||||
| </LoginLink> | ||||||
| ``` | ||||||
Arobce marked this conversation as resolved.
Show resolved
Hide resolved
|
||||||
|
|
||||||
| Behavior: | ||||||
|
|
||||||
| - The user authenticates | ||||||
| - The user is automatically added to the organization | ||||||
|
|
||||||
| This is the recommended default for most B2B SaaS applications. | ||||||
|
|
||||||
| ### Option 3: Auto-add users from allowed domains | ||||||
|
|
||||||
| Users are automatically added based on their email domain. | ||||||
|
|
||||||
| 1. Enable **Allow org members to be auto-added** | ||||||
| 2. Enable **Auto-add users from allowed domains** | ||||||
| 3. Add allowed domains (for example, `company.com`) | ||||||
|
|
||||||
| Example: | ||||||
|
|
||||||
| A user signing up with `jane@acme.com` is automatically added to the Acme organization. | ||||||
|
|
||||||
|
|
||||||
|
|
||||||
| ## Step 11: Track seat usage for billing | ||||||
|
|
||||||
| Kinde does not automatically calculate seat counts for metered billing. Your application must submit usage updates. | ||||||
|
|
||||||
| ### When to submit usage | ||||||
|
|
||||||
| Common triggers include: | ||||||
|
|
||||||
| - A user is added to an organization | ||||||
| - A user is removed or deactivated | ||||||
| - A scheduled reconciliation job (recommended) | ||||||
|
|
||||||
| ### How to submit usage | ||||||
|
|
||||||
| Submit usage using one of the following: | ||||||
|
|
||||||
| - Management API | ||||||
| - Workflows | ||||||
| Example: [Track org seat usage workflow](https://github.com/kinde-starter-kits/workflow-examples/blob/main/billing/trackOrgSeatUsageWorkflow.ts) | ||||||
| - Billing webhooks | ||||||
|
|
||||||
| This ensures billing reflects the number of active users in the organization. | ||||||
|
|
||||||
|
|
||||||
|
|
||||||
| ## Troubleshooting | ||||||
|
|
||||||
| ### Pricing table not shown during signup | ||||||
|
|
||||||
| Verify the following: | ||||||
|
|
||||||
| - The pricing table is **live** | ||||||
| - **Settings > Billing > Billing experience > Show pricing table during signup** is enabled | ||||||
| - The `pricingTableKey` matches the intended pricing table | ||||||
|
|
||||||
|
|
||||||
|
|
||||||
| ## Conclusion | ||||||
|
|
||||||
| You now have a complete B2B SaaS billing setup with organization-scoped access control, administrator-managed subscriptions, and per-user pricing using metered features. | ||||||
|
|
||||||
| From here, you can extend this architecture with additional metered features, scheduled usage reconciliation, or custom organization join flows using the Management API. | ||||||
This file contains hidden or bidirectional Unicode text that may be interpreted or compiled differently than what appears below. To review, open the file in an editor that reveals hidden Unicode characters.
Learn more about bidirectional Unicode characters
Add this suggestion to a batch that can be applied as a single commit.
This suggestion is invalid because no changes were made to the code.
Suggestions cannot be applied while the pull request is closed.
Suggestions cannot be applied while viewing a subset of changes.
Only one suggestion per line can be applied in a batch.
Add this suggestion to a batch that can be applied as a single commit.
Applying suggestions on deleted lines is not supported.
You must change the existing code in this line in order to create a valid suggestion.
Outdated suggestions cannot be applied.
This suggestion has been applied or marked resolved.
Suggestions cannot be applied from pending reviews.
Suggestions cannot be applied on multi-line comments.
Suggestions cannot be applied while the pull request is queued to merge.
Suggestion cannot be applied right now. Please check back later.
Uh oh!
There was an error while loading. Please reload this page.