==For theory and texture group only.==
为增加查阅体验与防止后续服务器内容的更改,请直接在github观看 https://github.com/OUCvisionLab/ServerGuide
本次更新内容:
- 会让3个人左右共同使用和维护一台专属服务器(自己组的服务器自行解决),也留下了1台机动的服务器。
- 考虑到留学生,所以采用了中英结合的书写方式
- 解释了一些虚拟环境的知识
[TOC]
| IP | 端口号Port | capacity | user name | password | Note任玉环 |
|---|---|---|---|---|---|
| 222.195.151.170 | 9013 | RAM:128G, CPU:2.3GHz*40, GPU:none | ouc-13 | b301 | GPU:none |
| 222.195.151.170 | 9015 | RAM:128G, CPU:2.3GHz*40, GPU:TESLA K40c 11G *1 | ouc-15 | b301 | LY,ZTG |
| 222.195.151.170 | 9028 | RAM:32G, CPU:3.5GHz*8, GPU:1080Ti 11G *2 | ouc-28 | b301 | LJX,HF |
| 222.195.151.170 | 9029 | RAM:32G, CPU:3.5GHz*8, GPU:2080 8G *2 | ouc-29 | b301 | HF |
| 222.195.151.66 | 9010 | RAM:32G, CPU:3.3GHz*4, GPU:TITAN X 12G | ouc-10 | b301 | Aman,Israel |
| 222.195.151.66 | 9018 | RAM:32G, CPU:3.5GHz*8, GPU:1080Ti 11G *2 | ouc-18 | b301 | ZQQ,LJH,Sadia |
| 222.195.151.66 | 9019 | RAM:32G, CPU:3.5GHz*8, GPU:1080Ti 11G *2 | ouc-19 | b301 | SQY,SCX |
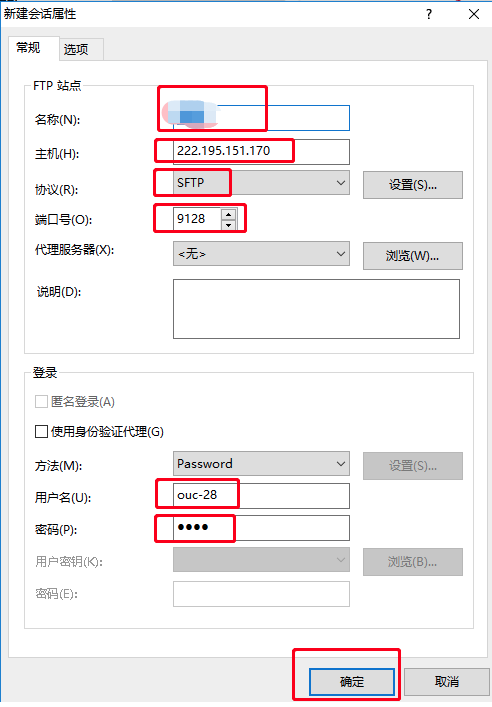
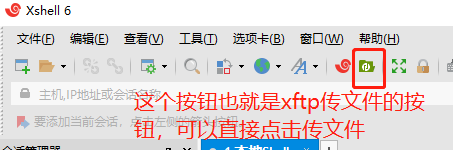
!!! port for transporting files is 91-- ,NOT 90--
传文件的端口是91--,选的协议是sftp。
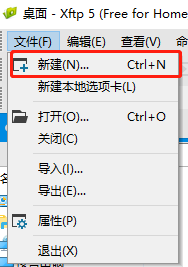
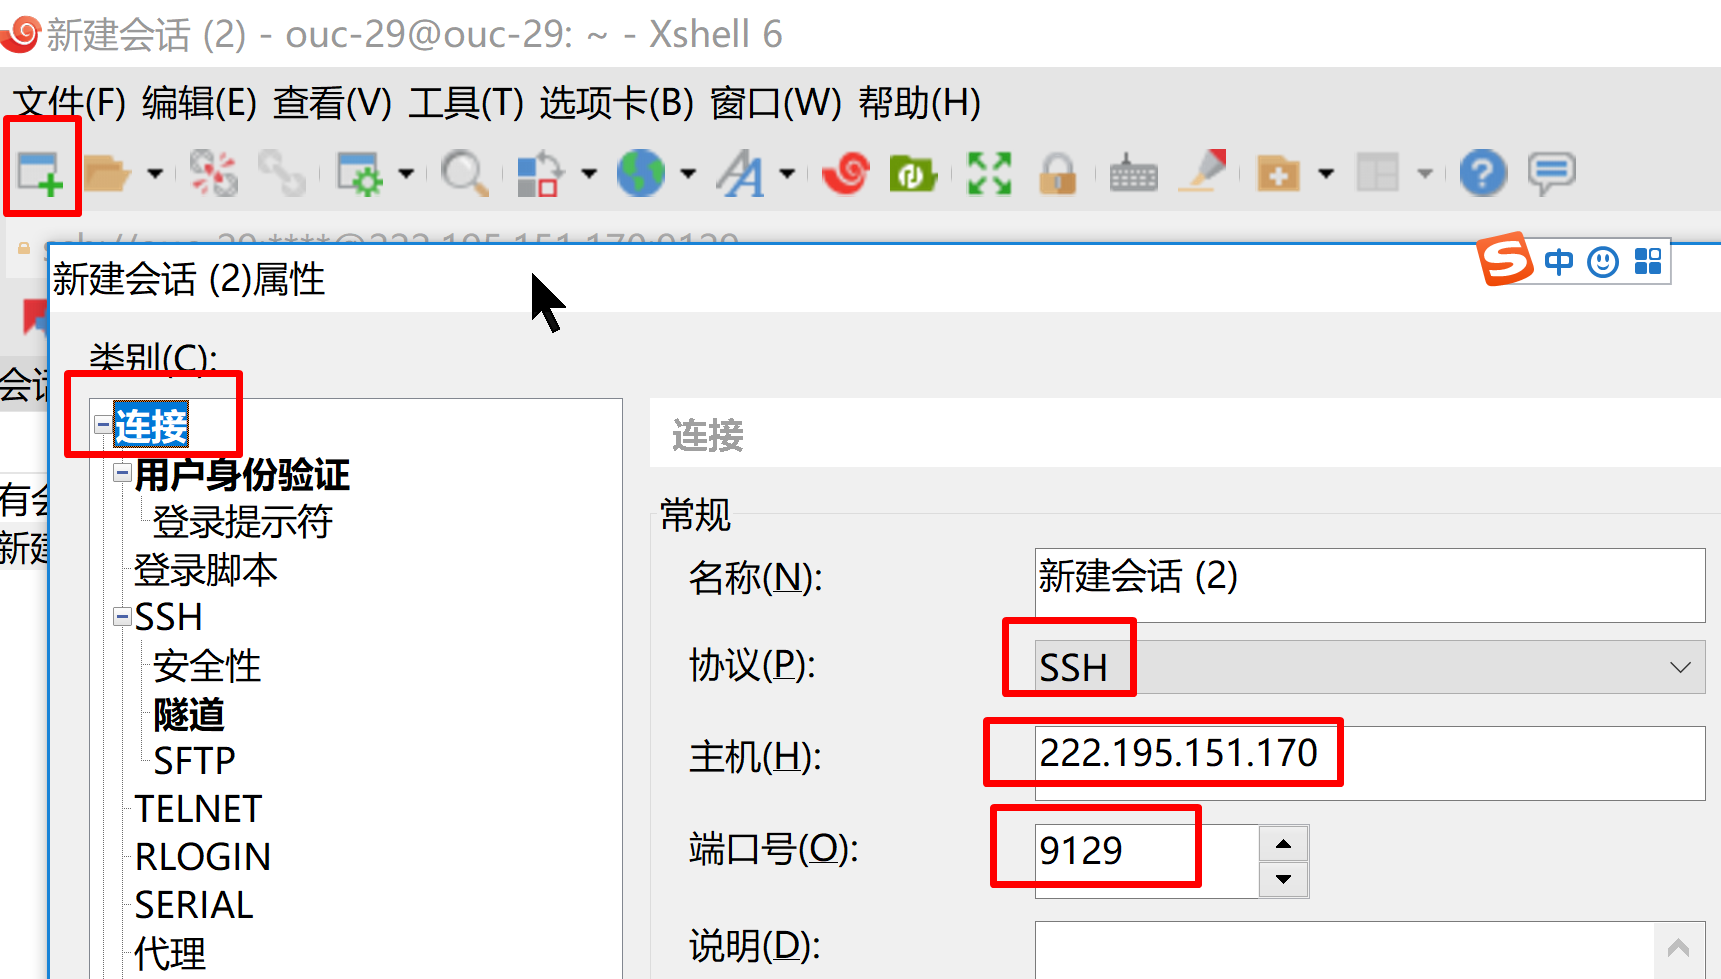
2.1 Find remote connection

2.2 Type in IP:port

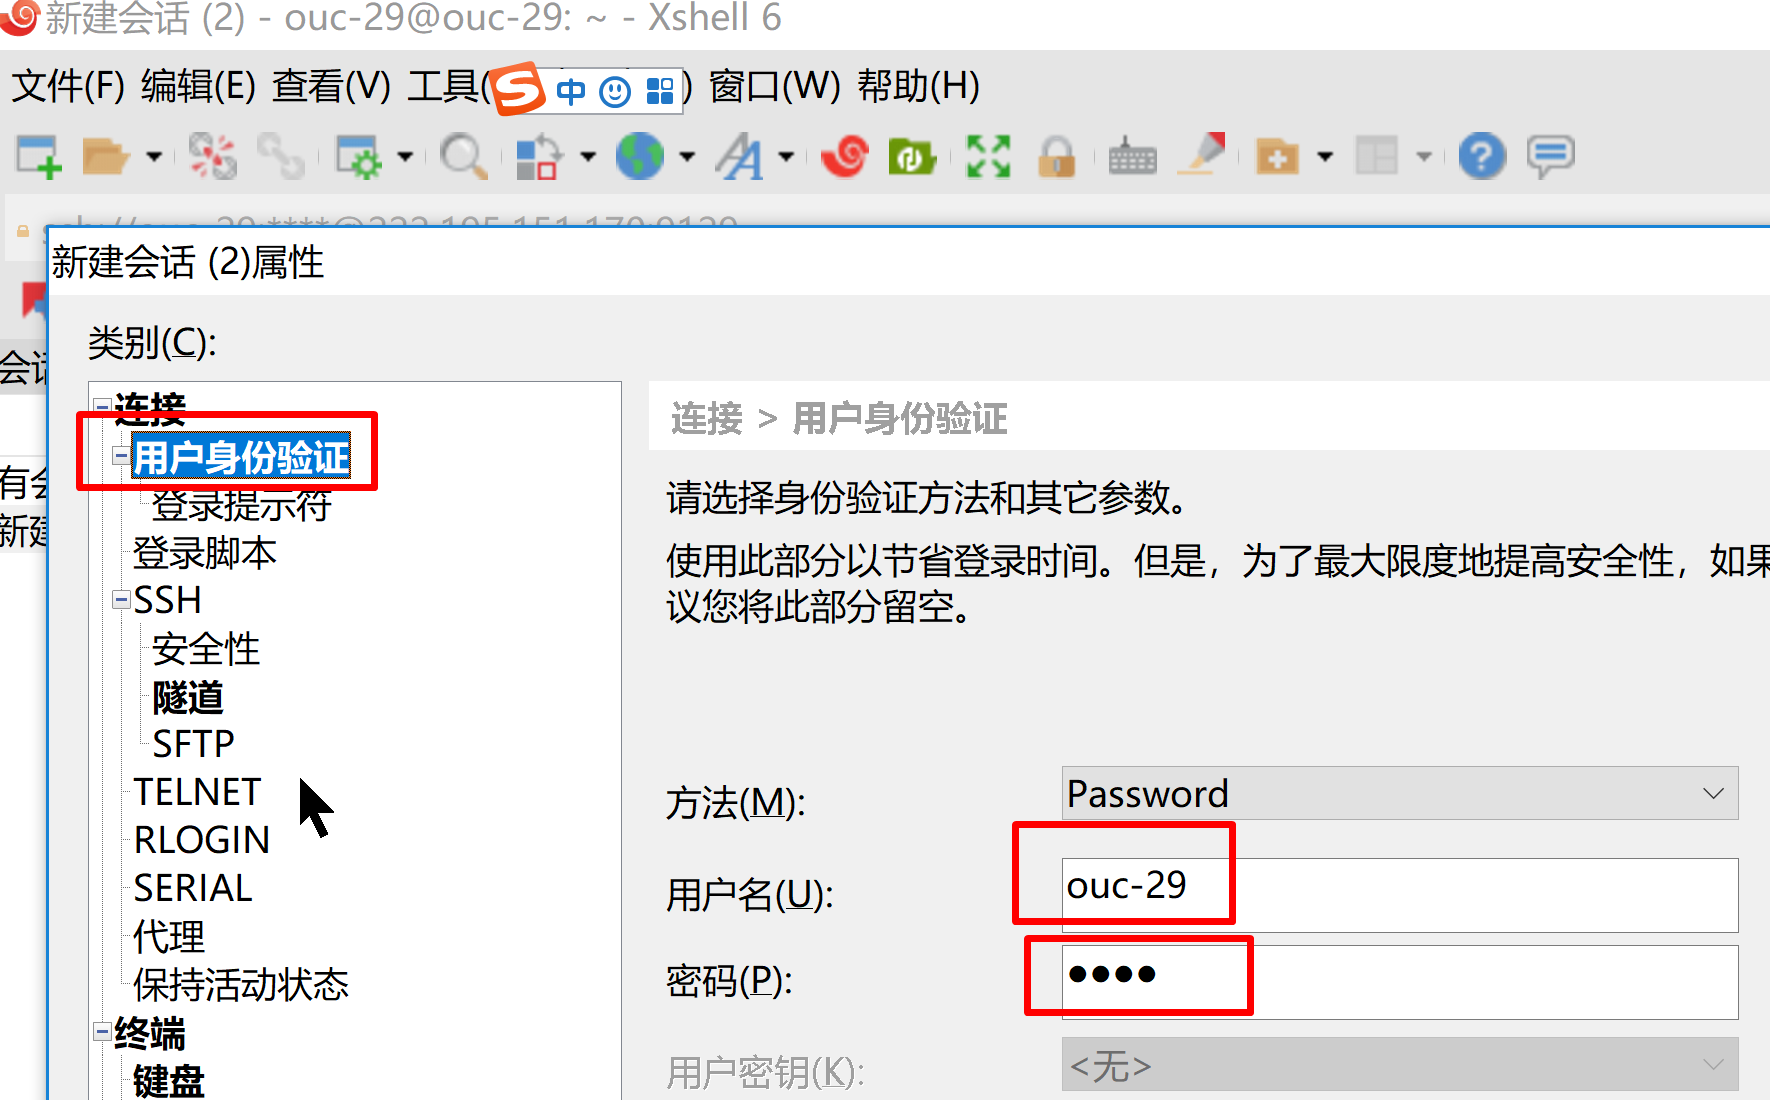
2.3 Type in username and password

**2.4 Once in the system, modify someone.txt to note your name and usage time.And you can put your personal files in directory /home/ouc-xx/**在home目录下创建自己的文件夹

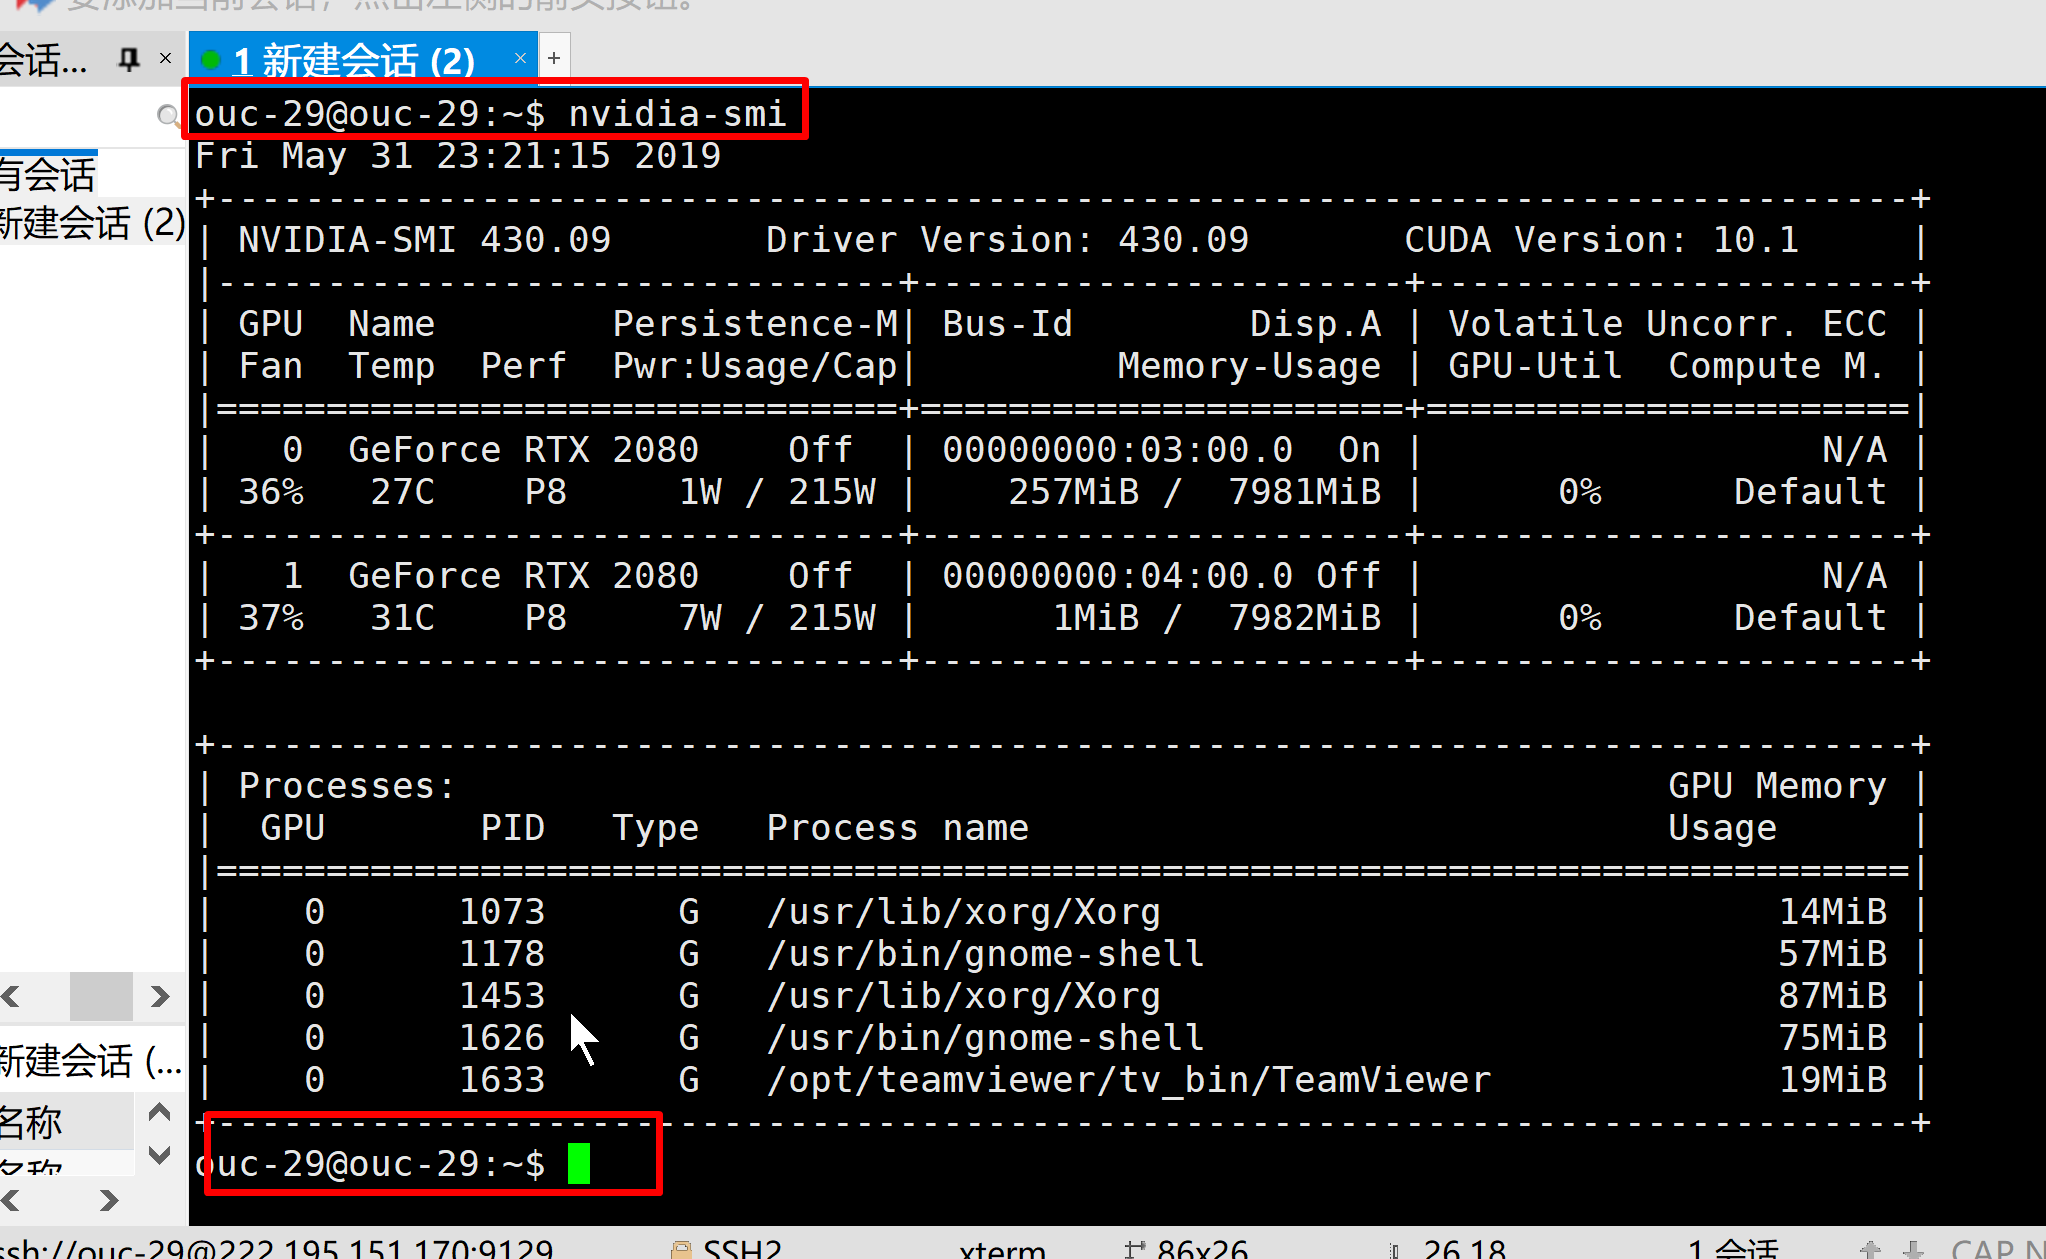
2.5 Before you run the code, please type in nvidia-smi in the terminal to make sure there's no another user.(在你正式跑代码之前,请输入nvidia-smi查看有没有其他用户在跑程序(通过红框部分看))。

此处是作用是验证没有人在使用此服务器
之前为大家创建过公用的python3.6和python2.7等,但是大家好像更倾向于使用很特殊的环境。所以此处修改为创建自己虚拟环境的注意项。
虚拟环境的原因:相当于两台服务器,互相使用的python不影响,即python版本和模块版本和独立的。
你的python的位置:Anaconda原有的python路径是/home/ouc/Anaconda3/python,而你的python地址是/home/Anaconda3/env/YOURNAME/python
环境变量在~/.bashrc文件里,不要轻易改动。~代表home目录
# View existing conda list 查看现有环境
conda info -e

# How to create a new environment创建环境
conda create -n YOURENAME python=PYTHONVERSION
# 如conda create -n hanfeng python=3.6。可以指定python版本

source activate YOURENAME
#or
conda activate YOURENAME

source deactivate  #退出原有环境,
#or#conda deactivate

# How to delete your personal environment 删除虚拟环境
conda remove -n YOURNAME --all1. # use conda。conda安装方式
conda install tensorflow-gpu=版本号
=======================
2. # use pip # pip安装方式
# if you wanna use pip,use 'python -m pip install' after 'source activate YOURNAME'
# 如果你要使用pip,务必先激活到自己的虚拟环境,然后使用下面的用法,因为直接输入的pip指向的并不是你的python,而是别人的。想要一探究竟可以打开/usr/local/bin下的pip文件看其原理
# 尤其是像pytorch这种包,conda命令经常安不上,使用pip命令的时候一定要使用'python -m'方式。
'--------offline pip installation,使用pip离线安装方式----------'
# 怎么下载文件:官网给出的pip安装方式显示的网址即是包的下载地址,可以去掉pip复制网址到浏览器下载,提供参考地址:
1.全:https://repo.continuum.io/pkgs/free/linux-64/
2.pytorch地址:https://pytorch.org/get-started/previous-versions/
3.tensorflow地址:https://mirrors.tuna.tsinghua.edu.cn/tensorflow/linux/gpu/
4.pip官方搜索地址(慢):https://pypi.org/
#下载后用pip安装,安装时候输入完python -m pip install 把文件拖进去即可,相当于要输入文件绝对路径。注意文件两侧各有一个'号
# 如下:
conda activate YOURENAME # or:source activate YOURENAME
python -m pip install FILE下载的文件
'--------online pip installation,使用pip在线安装方式----------'
conda activate YOURENAME # or:source activate YOURENAME
python -m pip install 模块
=======================ps:你也可以使用navigator界面的方式进行上面创建虚拟环境安装包等操作
ps: Similarly,you can type in
anaconda-navigator
in the terminal to open NAVIGATOR, and choose python from NAVIGATOR.

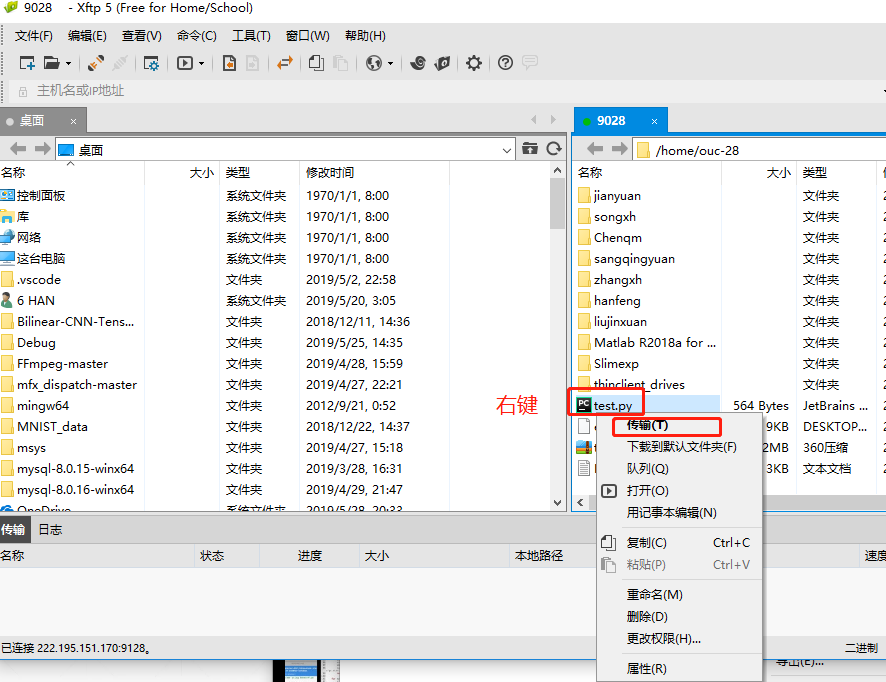
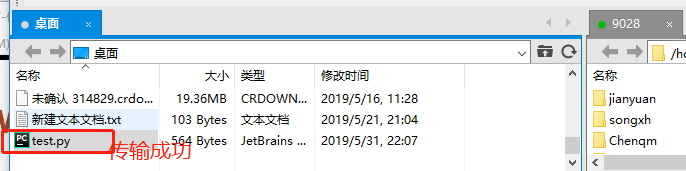
如果需要传文件,无需去机房拷贝,用Xftp传即可,文件可在网上下载破解版。
You can install Xftp in windows to transfer files. # windows安装xftp软件
Protocol:sftp # 协议选sftp
port is NOT 90-- BUT 91-- # 端口号是91--,而不是原来的90--
windows的远程的确有时候很卡,目前我也不知道该如何解决,或许在ubuntu18没有解决方案。至于为什么卡还在使用这个远程的原因请看6.2。
这里提高两种暂时的解决方案。
- 第一种方法是开teamviewer。但teamviewer与远程界面有时候有些矛盾,这可能是安的桌面的问题。所有teamviewer不一定100%有效。
- 第二种方法是用ssh命令行模式,ssh的操作如下:
如果ubuntu里没有ssh可以通过如下命令安装
sudo apt-get install openssh-server,在ubuntu端安装ssh。 输入"sudo ps -e |grep ssh"-->回车-->有sshd,说明ssh服务已经启动,如果没有启动,输入"sudo service ssh start"-->回车-->ssh服务就会启动。
在windows上安装xshell使用命令行:
破解xshell地址:https://blog.csdn.net/u011622631/article/details/88991941
安装后,打开xshell,新建链接如图,端口为91--
然后输入账户密码 后点ok
连接成功,界面如下:
清华源目前崩了,国内源基本不能用了,可以尝试中科大的镜像。实在不行就只好用pip或离线安装了
更改源的方式:
终端输入gedit ~/.condarc,删除原来全部内容,添加如下内容
channels:
  - https://mirrors.ustc.edu.cn/anaconda/pkgs/free/
  - default
show_channel_urls: true
因为teamviewer总会出现商业版问题,所以无奈选择远程连接的方式,如果你使用时间较长,可以试着连teamviewer使用。
因为ubuntu不好实现远程连接,必须通过安装小老鼠界面间接控制ubuntu。ubuntu16可能有解决方案,但ubuntu18较难解决,而我们的ubuntu当初安装的是18版本,所以尽管小老鼠界面不美观,但还得接着使用。
- ubuntu18配置远程参考此链接的第二个方法https://blog.csdn.net/star2523/article/details/81152890
- 在ubuntu16下可能存在完美的解决方式请参考:https://blog.csdn.net/qq_37674858/article/details/80931254 , https://www.cnblogs.com/xuliangxing/p/7642650.html
- 原来服务器配置人员的博客:https://blog.csdn.net/zhouxiaowei1120/article/details/80872919
如有在远程上打不开终端,可以使用sudo apt-get remove gnome*
参考链接 https://blog.csdn.net/hancoder/article/details/86634415
- 配置显卡驱动,cuda,cudnn
- 重新配置IP以便可以远程连接
- 安装ssh以便文件传输:
apt-get install openssh-server
vim /etc/ssh/sshd_config
将PermitRootLoginwithout-password注释,
添加一行: PermitRootLoginyes
service ssh restart
远程连接方式可看上面小老鼠问题
6.5.1 配置环境变量的文件Some environment variables are configured in ~/.bashrc
6.5.2 please debug your code on your PC to save server resources.
6.5.3 If your server resources are insufficient, please contact HAN. There may be servers unallocated for you.
6.5.4 以后更新尽量在此github更新IP等内容,账号即OUCvisionLab,密码可问管理员索要。
5.2.5 Maybe you want to install Anaconda2.To be honest, it's not usually used, because python2.7 has been involved in Anaconda3. If you think about it, what is noteworthy is that when you install anaconda2,
Anaconda2 will now be installed into this location:home/xx/anaconda2
-Press ENTER to confirm the location
-Press CTRL-C to abort the installation
-Or specify a different location below
[/home/xx/anaconda2]>>>
don't press ENTER, you should type in your personal directory such as : /home/ouc/Tom/Anaconda2/
Do you with the installer to prepend the Anaconda2 install location to PATH in your /home/ouc/.bashrc ?[yes|no]
please type in no